Sunday, November 1, 2009

Halloween Party Grub

Here is what I made for our Halloween Party.

Smoked Meatballs, stuffed with Pepper Jack and Bacon.


Ready for the Rub


Spiced up and put in the Fridge overnight.


Smoked with Hickory and Ready to Pull off the Grill


Wings are Rubbed and ready for cooking


Covered with Spicy Chipotle Sauce, I also made some Honey BBQ, but the picture was way out of focus.


For all of the other food, go to my Wifes Blog, she has all the details about the party.
Halloween Party 2009

Saturday, July 25, 2009

Chipotle Meatloaf


Here is a recipe I threw together the other night.

Ingredients:

2 Pounds Ground Chuck
3 Jalapeno Peppers (Seeded and Finely chopped)
1/4 Cup Yellow onion (Finely chopped)
1/2 Cup Glaze (Recipe Follows)
1/2 tsp Fresh Cracked Black Pepper
1/2 tsp Kosher Salt
1 Egg
1/2 Cup Bread Crumbs
1/2 Cup Cherry Wood Chips(optional)

Glaze:
1/2 Cup Ketchup
1 tsp Worcestershire Sauce
2 cloves pressed garlic
2 tsp Chipotle in Adobo Sauce(liquid)

Instructions:
Mix Ground Beef, Jalapeno, Onion, Salt, Pepper, Bread Crumbs, Egg, and 1/4 cup of the Glaze(save the rest for later). The meatloaf should be about 9x5x3 if shaping it by hand, or you can shape it in a loaf pan.

Cooking Instructions:
Setup Grill for Indirect cooking at 400 Degrees. Put a digital meat thermometer in the thickest part of the meat. Cook until the internal temperature is about 120 Degrees and brush on the glaze. The meatloaf is finished when the internal temp is 155 Degrees. Let it rest in tented under aluminum foil for 10 minutes, slice and serve. You could make 2 times the amount of glaze so everyone can put more on theirs.

Here is the Meatloaf sliced and ready to eat!!


Wednesday, July 15, 2009

Reverse Seared Beef Roast

Here is a recipe I found on bigoven.com. Marinate the beef roast as per the instructions on the recipe. I removed the roast from the marinade, covered it with pepper and garlic powder and let the roast come up to room temp for about an hour. The cooking method I used for this I found on the Primo Grill Forum, anyone can join the forum and there is alot of good info on there. The person credited with the "Reverse Sear" is a guy on the forum named Finney. This method can be used for just about anything including thick cuts of steak. Start by getting the grill for indirect cooking to a temperature of 250 degrees F, cook the food to about 5 degrees or so below what you would like the final temperature to be(beef ended up being about an hour per pound). Wrap the item(s) in aluminum foil for about 5 minutes and get a hot fire going on the grill. Sear the food on High Heat for about a minute to a minute and a half on all sides(if there are more than two sides).

Here is a picture of the roast right after finishing.


Here is another picture of it after slicing.


This cooking method allows the middle of the roast to be cooked uniformly while getting a good seared crust on the outside.

Sunday, July 5, 2009

My Primo Ceramic Grill

Well, anyone who has read my earlier blogs knows that I got a Holland Grill in late October. I have cooked for family and friends a few times since then and sometimes when cooking for holiday events, there just is not enough room on one grill. I started doing some research on how I could get the most versatility out of another grill. I finally decided the best grill to buy was a ceramic cooker. There are a few brands out there, but the one I got is a Primo. Ceramic grills retain heat better than any other on the market, when opening the grill is required, the recovery time to get the inside back up to temperature is very short. One firebox filled with Lump Charcoal can cook something "low and slow", like brisket and pork shoulder, for about 36-40 hours without adding any charcoal and keep a consistent temperature within 10 degrees F. The grill requires Lump Charcoal to be used, it burns hotter and lasts longer than briquettes with producing very little ash. Natural Lump charcoal has no binders or fillers, it is 100% natural hardwood. Here is a picture of the grill.


The temperature of the grill is set by adjusting the bottom vent to restrict the amount of oxygen to feed the fire. The top vent also plays a part in the temperature control, but has little effect because more air can not leave than is allowed in. A ceramic grill is capable of a temperature range from 150-700+ Degrees F, allowing anything from smoking to searing. Below is a picture inside the grill, the firebox holds the charcoal, and a cast iron firebox divider that is used when cooking less food or cooking indirectly.


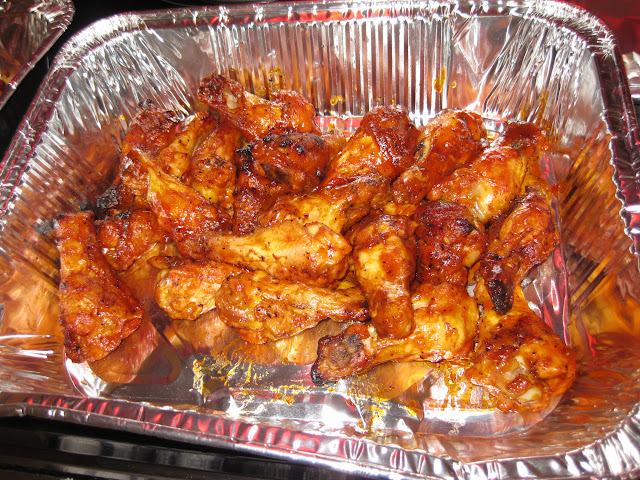
Here is a few pictures of what I cooked on Independence Day. There was marinated pork steaks and grilled veggies. The pork is cooking directly over the coals and the veggies are being cooked with the radiant heat from the ceramic walls(top). I did first grill the vegetables over direct heat in a grilling wok(bottom) before putting them in the pyrex dish.


One of the features I love about this grill is that since it is sealed with a gasket, when you are done cooking you just close the bottom and top vents. The fire will go out and the remaining charcoal can be re-used.

I do have to give a shout out and thank Gamble for helping me put the grill in its cart, otherwise I would still have 200 lbs of ceramic in my hatchback.

Saturday, June 20, 2009

Pulled Pork

8 lb Picnic Shoulder Before Cooking

After cooking it is fall off the bone tender

Butt Rub:

¼ Cup Sweet Paprika

3 TB Kosher Salt

2 TB Ancho Chile Powder

2 TB Garlic Powder

2 TB Turbinado Sugar

2 TB Mexican Oregano

1 TB Coarse ground Black Pepper

1 TB Thyme

2 TS Cumin Powder

2 TS Onion Powder

2 TS Mustard Powder

2 TS Cayenne Pepper

½ TS Celery Seed


Instructions: Put all ingredients in a bowl and mix thoroughly.

Makes Approximately 1 Cup

Prep Work:

One day prior to cooking, Trim the skin off the pork shoulder leaving a layer of fat on top. Rinse the meat and pat dry with paper towels. Cover the pork shoulder with Butt Rub and refrigerate overnight. Take it out of the fridge one hour before cooking to knock the chill off the meat.

Cooking Instructions:

I have a Holland Grill so you may have to change it up a little if you don't have one. The key to the tenderness in the meat is getting the internal temperature to 205 degrees.

I used Hickory wood pellets for smoke flavoring from BBQr's Delight to add some smoky flavor to the pork. You can use an aluminum foil pouch(directions on their website) or they sell a cast iron pot.

Once the grill started to smoke, I put the pork shoulder on. I cooked it for one hour per side to put a little crust on it. After the two hours, I inserted a probe from a digital thermometer in the thickest part of the meat and double wrapped the shoulder in Heavy Duty foil. I then cooked it until the internal temperature was 205. Prepare a cooler by putting an old towel on the bottom. When you remove the pork shoulder from the grill, I put mine in an oven bag so if it leaked that the towels are not stained. Then surround the pork shoulder with towels, leaving the end of your temperature probe hanging out of the cooler. I left mine in the cooler for 3 more hours and the temperature was still 179 degrees. The procedure using the cooler will keep the meat in the temperature range that breaks down the connective tissue. Remove from the cooler and foil, save any juices to pour on the pulled pork. The meat should just fall apart. Pull/chop the meat, put a teaspoon of rub into the meat as you are pulling it and mix it up, put pork on a toasted bun and serve. I personally don't put BBQ sauce on mine, but I usually make one or two varieties for the rest of the crowd.

The total cooking time of the meat was about 4 hours, then another 3 hours in the cooler. Your time may vary depending on your grill and the size of the pork shoulder you buy.

Smokin Wood Pellets


Not too long ago I was surfing the web looking for more recipes and grilling gadgets. I stumbled upon a site that sells 14 different flavors of wood pellets for adding flavor to your food. The company is BBQr's Delight, and they use 100% hardwood in all of the pellets. I bought a sampler pack that had 20 single serving packages, some BBQ rub samples and a cast-iron smoker pot to use with the pellets. The advantage of pellets over wood chips is that pellets don't have to be soaked prior to use. I use the pellets in the iron pot when I want a heavy smoke on Pork Shoulder, Brisket, Whole Turkey. Below I have a picture of the volume of smoke from the pot, it usually lasts for a little less than 15 minutes, but adds a really good smoke flavor to your food.

Sunday, February 8, 2009

Buffalo-Garlic Drumsticks


Here is a recipe I made last weekend, I was really craving Buffalo wings on Superbowl Sunday. I used five drumsticks, but they could be substituted with wings or thighs. I brushed the chicken with olive oil and cooked it at 425 Degrees on my Holland Grill for 45 minutes, with a handful of Hickory Flav-o-buds for some extra flavor. I then applied the sauce and let them let them cook for about another 10 minutes.
This recipe could be made in an oven at 425 Degrees or in an outdoor grill using indirect heat.


5 Chicken Drumsticks
Olive Oil

Hot Sauce Recipe:(was plenty for 5 drumsticks with a little left over)Check Spelling
1/4 Cup Louisiana Hot Sauce
1/4 Cup Ketchup
1/2 Tsp Worcestershire Sauce
1/4 Cup Unsalted Butter
1/2 Tsp Black Pepper
1/2 Tsp Garlic Powder
1/4 Tsp Onion Powder
1/4 Tsp Cayenne Pepper
1/4 Crushed Red Pepper

Mix all ingredients except butter in a non-reactive sauce pan and simmer on medium low for about 10-15 minutes. Remove from heat and stir the butter into the sauce. The sauce can be applied to the chicken by a basting brush or by putting the sauce in a rubber-maid container with the cooked chicken and shaking it.